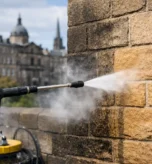
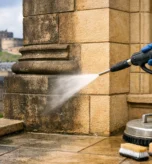
A blackened sandstone frontage can make an otherwise well-kept Edinburgh property appear tired, neglected or beyond repair. Yet the dark layer is rarely just surface dirt. Stone cleaning explained: restoring Edinburgh’s sandstone to its former glory begins with understanding what has settled into the masonry, how sound the stone remains beneath it, and which cleaning method will protect rather than damage the original fabric.
For period and listed buildings, cleaning is not a cosmetic shortcut. Done properly, it is a controlled conservation process that can reveal the natural warmth and detail of sandstone while supporting wider repairs, lime pointing and long-term maintenance.
Why Edinburgh sandstone becomes dark and uneven
Edinburgh’s sandstone has endured decades, and in many cases centuries, of rain, wind, traffic pollution and changing building practices. Older deposits of soot can form a dense, dark crust, particularly beneath projections, around window surrounds and on sheltered areas of a façade. More recent staining may come from airborne pollution, algae, moss, bird droppings, rusting metalwork or water running repeatedly over one section of wall.
Sandstone is naturally porous. That quality is part of its character, but it means contaminants can lodge within its surface rather than simply sitting on top. Moisture also plays a major part. Where defective gutters, failed flashings, cracked stone or hard cement pointing hold water in the wall, staining often returns quickly and deterioration can progress behind the visible surface.
A façade does not always weather evenly. The exposed elevation may be pale and open-textured, while a sheltered frontage remains dark with historic deposits. That contrast can be striking, but it does not mean every area should be cleaned to exactly the same appearance. The aim is a coherent, natural finish that respects the age and varied weathering of the building.
Stone cleaning explained: assessment comes before cleaning
Before any cleaning begins, a specialist stonemason should inspect the stone closely. This assessment identifies the sandstone type, its condition, the nature of the staining and any defects that need attention first. Loose fragments, spalling faces, open joints, eroded carvings and previous inappropriate repairs can all be made worse by an unsuitable cleaning process.
The inspection should also consider the wider building. A staining problem may be evidence of a leaking downpipe, overflowing gutter, corroded fixing or trapped moisture rather than a problem with the stone itself. Cleaning without addressing the source can leave the property looking better temporarily while the underlying cause continues.
Test panels are central to good practice. Small, discreet areas are cleaned using carefully selected methods and pressures, allowing the result to be reviewed before work proceeds across the elevation. This helps establish how the sandstone responds and avoids the risk of removing its protective surface or creating an unnaturally pale, patchy finish.
For listed properties or buildings within sensitive historic settings, the scope of work may also need to reflect consent requirements and conservation expectations. A preservation-first approach keeps intervention proportionate and retains as much original stone as possible.
Choosing the right cleaning method
There is no single method that suits every sandstone building. The correct approach depends on the stone’s strength, porosity and decay, as well as the type and thickness of the soiling. A method that is acceptable on a hard, sound stone can be too aggressive for a softer, weathered ashlar block.
Gentle water-based cleaning
Low-pressure water cleaning can gradually soften and remove general surface dirt and some biological growth. It must be carefully controlled, however. Excessive pressure can erode the stone face, force water into open joints or expose weaker material beneath a hardened crust.
Water-based methods are often useful where the stone is fundamentally sound and the deposits are not deeply bonded. They are not a substitute for repairs. If water is entering through defective mortar joints or cracks, those faults should be dealt with as part of the restoration programme.
Steam and specialist poultices
Superheated steam can be effective for certain surface deposits, biological growth and localised staining, using very little water. Specialist poultices may be considered for isolated stains such as rust or deeply ingrained discolouration. These methods demand careful testing because each stain and stone type behaves differently.
The benefit of targeted treatment is control. Rather than subjecting an entire elevation to a stronger process, the stonemason can treat the affected area while retaining the surrounding stone’s natural patina.
Abrasive cleaning and why caution matters
Abrasive techniques can remove heavy soiling, but they are not automatically appropriate for historic sandstone. Used too aggressively, they can strip the stone’s fired outer surface, soften crisp arrises around windows and quoins, and leave a roughened texture that attracts dirt and moisture more readily.
This does not mean such methods have no place. On some durable stone, with the right media, low pressure and experienced control, they may be justified after testing. The crucial point is that cleaning should be selected for the building, not chosen because it is the fastest way to create a dramatic before-and-after result.
What careful cleaning can and cannot achieve
Professional cleaning can transform the appearance of a property in New Town, Morningside, Stockbridge or elsewhere across Edinburgh. It can reveal architectural detail hidden by soiling, improve the presentation of a commercial frontage and make repairs easier to assess accurately. It may also remove algae and organic growth that hold moisture against the masonry.
However, cleaning cannot restore stone that has already been lost through erosion, delamination or spalling. A black crust can sometimes conceal weakened sandstone, and once it is removed, the need for stone repair becomes clearer. This is not necessarily a failure of the cleaning work. It is an honest indication of the condition beneath.
Where stone has decayed beyond reliable repair, carefully matched sandstone replacement may be the most durable option. Smaller areas can sometimes be repaired with a compatible specialist mortar, shaped and finished to follow the original profile. The choice depends on the size of the defect, the condition of the surrounding stone and the importance of retaining original fabric.
Cleaning alongside lime pointing and stone repair
Stone cleaning is most effective when it forms part of a considered restoration plan. Open or cement-filled joints should be assessed before cleaning, particularly on older buildings designed to breathe through lime mortar. Hard cement pointing can trap moisture in softer sandstone, contributing to cracking and spalling at the edges of masonry units.
Raking out failed or inappropriate mortar and repointing with a suitable lime mix allows the wall to manage moisture more naturally. Repairs to cracks, eroded joints, defective copings and water-shedding details may be required at the same time. Once these issues are addressed, the cleaned stone is far more likely to remain stable and attractive.
The sequencing varies by property. In some cases, preliminary repairs are needed to make cleaning safe; in others, gentle cleaning helps expose the full extent of defective stone before final repair and repointing. A site-specific assessment is the only reliable way to decide.
Avoiding common mistakes with sandstone
The greatest risk is treating historic sandstone like modern brickwork or concrete. Domestic pressure washers, strong acid cleaners and untested chemical products can cause irreversible damage. They may bleach the stone unevenly, dissolve vulnerable minerals, scour mortar joints or drive moisture into the wall.
Painting or coating a stained façade is another tempting but problematic response. Impermeable coatings can conceal damp and alter the way the masonry dries. They also change the authentic appearance of sandstone and can create a more difficult restoration problem later.
A better approach is to identify the cause of staining, repair active defects and use the least aggressive cleaning method that achieves an appropriate result. This is slower than a one-size-fits-all clean, but it protects the workmanship and materials that give Edinburgh’s period buildings their value.
Caring for sandstone after restoration
After cleaning, routine observation makes a real difference. Keep gutters and downpipes clear, watch for overflowing rainwater goods, and address failed sealant or loose flashings before moisture creates a persistent staining pattern. Check lower walls for splashback and biological growth, especially on shaded elevations.
The natural colour of cleaned sandstone will settle over time as it is exposed to Edinburgh’s weather. A slight mellowing is normal and often desirable. The goal is not to make a nineteenth-century façade look newly built, but to preserve its sound stonework, clear its details and allow its original character to be seen again.
For owners responsible for a historic property, a careful survey by specialist stonemasons offers a sound starting point. A & M Sandstone Restoration Edinburgh can assess the condition of the masonry, explain suitable cleaning options and advise where repair or lime pointing should accompany the work, so the building is cared for as a lasting part of the city’s architectural heritage.